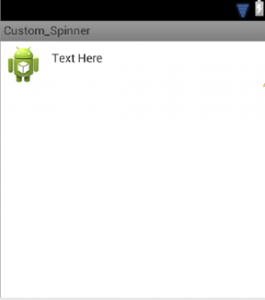
在“如何创建Android小部件”这个主题中,我们将学习如何在Android中创建自定义微调器。Spinners是Android中的一个小部件,它允许用户从项目列表中选择一个项目。微调器中的项来自关联的适配器。
微调器提供了从集合中选择一个值的快速方法。在默认状态下,微调器将显示其当前选定的值。触按微调器将显示一个包含所有其他可用值的下拉菜单,用户可以从中选择一个新值。
示例:显示一周中的天数列表,选择一个项目后,它将在Toast中显示该项目。
1)全局声明微调器,即在onCreate方法之外
 // Declare the variable outside onCreate
Spinner spin;// Typecasting the variable here
spin = (Spinner) findViewById(R.id.spn1);
// Array of Months acting as a data pump
String[] objects = { "January", "Feburary", "March", "April", "May",
"June", "July", "August", "September", "October", "November","December" };
// Declaring an Adapter and initializing it to the data pump
ArrayAdapter adapter = new ArrayAdapter(
getApplicationContext(),android.R.layout.simple_list_item_1 ,objects);
// Setting Adapter to the Spinner
spin.setAdapter(adapter);
// Setting OnItemClickListener to the Spinner
spin.setOnItemSelectedListener(this); // Defining the Callback methods here
public void onItemSelected(AdapterView parent, View view, int pos,
long id) {
Toast.makeText(getApplicationContext(),
spin.getItemAtPosition(pos).toString(), Toast.LENGTH_LONG)
.show();
}
// Defining the Callback methods here
@Override
public void onNothingSelected(AdapterView arg0) {
// TODO Auto-generated method stub
}
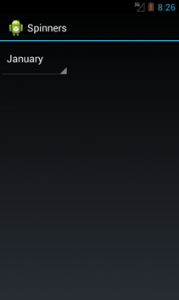
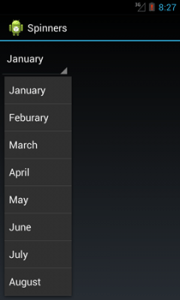
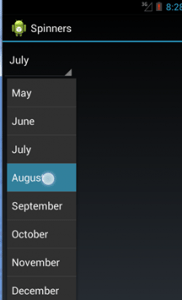

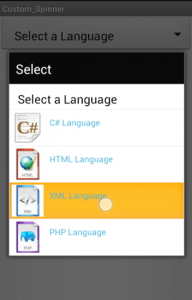
这更像是一个“真实而实用的”Spinner。
创建自定义微调器的步骤:
1) onCreate方法之前:
声明必须在微调器中显示的项的数组
声明一个数组,其中包含必须与项一起显示的相应图像的资源id。
 // Declaring the String Array with the Text Data for the Spinners
String[] Languages = { "Select a Language", "C# Language", "HTML Language",
"XML Language", "PHP Language" };
// Declaring the Integer Array with resourse Id's of Images for the Spinners
Integer[] images = { 0, R.drawable.image_1, R.drawable.image_2,
R.drawable.image_3, R.drawable.image_4 };
内部onCreate方法:
铸型旋转器
创建数据泵
声明和分配自定义适配器
 // Declaring and typecasting a Spinner
Spinner mySpinner = (Spinner) findViewById(R.id.spinner1);

// Setting a Custom Adapter to the Spinner
mySpinner.setAdapter(new MyAdapter(MainActivity.this, R.layout.custom,
Languages));
onCreate方法之后:
定义自定义适配器,即MyAdapter
 // Creating an Adapter Class
public class MyAdapter extends ArrayAdapter {

public MyAdapter(Context context, int textViewResourceId,
String[] objects) {
super(context, textViewResourceId, objects);
}

public View getCustomView(int position, View convertView,
ViewGroup parent) {

// Inflating the layout for the custom Spinner
LayoutInflater inflater = getLayoutInflater();
View layout = inflater.inflate(R.layout.custom, parent, false);

// Declaring and Typecasting the textview in the inflated layout
TextView tvLanguage = (TextView) layout
.findViewById(R.id.tvLanguage);

// Setting the text using the array
tvLanguage.setText(Languages[position]);

// Setting the color of the text
tvLanguage.setTextColor(Color.rgb(75, 180, 225));

// Declaring and Typecasting the imageView in the inflated layout
ImageView img = (ImageView) layout.findViewById(R.id.imgLanguage);

// Setting an image using the id's in the array
img.setImageResource(images[position]);

// Setting Special atrributes for 1st element
if (position == 0) {
// Removing the image view
img.setVisibility(View.GONE);
// Setting the size of the text
tvLanguage.setTextSize(20f);
// Setting the text Color
tvLanguage.setTextColor(Color.BLACK);

}

return layout;
}

// It gets a View that displays in the drop down popup the data at the specified position
@Override
public View getDropDownView(int position, View convertView,
ViewGroup parent) {
return getCustomView(position, convertView, parent);
}

// It gets a View that displays the data at the specified position
@Override
public View getView(int position, View convertView, ViewGroup parent) {
return getCustomView(position, convertView, parent);
}
} <LinearLayout xmlns:android="http://schemas.android.com/apk/res/android" android:orientation="vertical" android:layout_width="fill_parent" android:layout_height="fill_parent">
<Spinner android:drawSelectorOnTop="true" android:id="@+id/spinner1" android:layout_width="match_parent" android:layout_height="wrap_content" android:prompt="@string/select">
</LinearLayout>
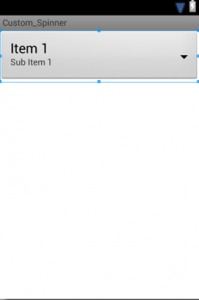
5) 创建一个名为custom.xml:
它包括
1、图像视图
2、文本视图
<LinearLayout xmlns:android="http://schemas.android.com/apk/res/android" android:layout_width="match_parent" android:layout_height="wrap_content" android:padding="3dip">
    <ImageView android:id="@+id/imgLanguage" android:layout_width="wrap_content" android:layout_height="wrap_content" android:src="@drawable/ic_launcher">
    </ImageView>
    <TextView android:id="@+id/tvLanguage" android:layout_width="wrap_content" android:layout_height="wrap_content" android:layout_marginLeft="10dp" android:layout_marginTop="8dp" android:text="Text Here">
    </TextView>
</LinearLayout>